Saturday, October 5, 2013

The Great Flood, Part II

Hey, remember that time I wrote a post about how we had a pipe leak that damaged 4 rooms and we were starting to renovate them? Yeah? Well guess what...
 
We had a 20 year old GE dishwasher in our kitchen that I hated. It was loud, ugly, and ready to break at any time. Since we were doing other renovations to the house, I figured that now would be the perfect time to replace that old dishwasher. I figured it would save us any future headaches from more leaks (since we just learned what a pain in the ass those can be).
 
So I ordered a nice, new Whirlpool dishwasher: stainless steel, top controls, quiet, everything I wanted. Home Depot was set to do the install on the following Saturday. Installation day arrives, and the dishwasher gets put in. The guys set it up, put the kick plate on, and get ready to run a test cycle. I'm nervous, since I don't want anything to be wrong. They turn the water back on, turn on the dishwasher and... no leaks!
 
We go about our business for a couple of weeks, when I start noticing cracking in our cabinetry. It was next to the dogs' water bowl, and I knew it looked like water damage, so I assumed that somehow the dog started splashing water on the cabinets. I moved the bowl. A few days later we notice water along a corner of our foundation. We assumed the hose was leaking, so we moved that too. Then, the next morning arrived.
 
The water was still there. Something clicked in J's head and he goes, "The dishwasher is on the other side of the wall." But how is that possible, you ask. They checked for leaks! You watched them! No, no they didn't. Long story short... They assembled and installed the whole dishwasher, including the kickplate, prior to turning the water on. Had they tested without the kickplate they'd have seen that they didn't tighten the water line where it connects to the dishwasher. This little "oversight" created a constant stream of water flowing under our cabinets for two weeks.
 
I won't get into the weeklong ordeal of dealing with Home Depot and the subcontractor playing a game of "Whose insurance company pays for this," but I will say that it has been hell. After 5 days, Servpro was finally sent out by one of their insurance carriers to remove all the water damage and clean up the disgusting amount of mold that was infesting half of our kitchen. FIVE DAYS. My sinuses are still killing me from inhaling that crap.
 
I still have yet to hear from an actual claims adjuster, but we were told to get contractor estimates. So, that's what we're doing. As of now we'll need at least 3 entirely new base cabinet units, refacing for all existing cabinets since we haven't been able to find matching doors, our wallpaper removed and the kitchen repainted, new countertops, and a new backsplash... for starters. And you know what? Home Depot has been so terrible throughout this whole situation that unless they somehow make things right, we won't spend one dime at their store ever again.
 
The subcontractor they hired that caused all of this damage was rated F with the BBB. They refused to give us their insurance info, and even when I told Home Depot that, Home Depot told me that I still needed to handle the issue with the subcontractor. I was made to do all the work to remediate an issue that they ultimately caused. It's been terrible.
 
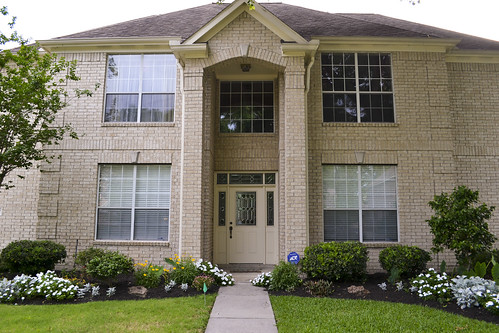
As of today, here is what I'm left with in our kitchen. Notice our dishwasher and sink are gone. We have been left with an unusable kitchen. All I wanted was a new dishwasher to prevent a disaster like this from happening. Preventative maintenance. I don't even know the term for what I've been left with, but "shit" fits the bill pretty well.


Saturday, September 21, 2013

The Great Flood

Oh, where to begin... Over the summer I had high hopes for doing crafts and DIY projects, and then blogging about them. I managed to do a lot of crafts and DIY projects, but I kept missing that blogging step.

I was just finishing up some curtains that I was going to use to segue myself back into the blogosphere...

These curtains, to be exact:


And then this happened:


"What caused it?" you ask... This. This stupid pipe right here:


That pipe connects to our A/C drain pans and routes the water into a drain line. In Houston, as we now know, it is illegal to have your A/C drain line run directly to the exterior of your house. It has to drain internally. Why? Well an A/C unit apparently produces over one gallon of water per day. We have two units, so that's over two gallons per day. If every house had two gallons of water consistently pooling outside, it would cause a large mosquito problem.

So this was the solution. An interior drain. However, our home was built in 1994 and they no longer use this kind of design anymore. Why? Because they can get algae built up inside and overflow. Surprise, surprise.


Anyway, my first clue that something was wrong was when I noticed water all over the dryer in the laundry room. There is a bathroom directly above, which we don't use, so I thought that maybe a seal dried out and broke and it dumped water onto the floor. Upon further investigation upstairs, we realized the leak was coming from the attic, and there was far more damage than just the laundry room.

Here is what we're dealing with... We had minor damage to our dining room, that was the good news. It meant that our wood floor, which runs through the entire downstairs, was unharmed. We had major damage to our laundry room, my studio, and a bathroom. Those three rooms need extensive drywall repair, the laundry room needs a new ceiling, and the bathroom and studio need new floors as well.

We've had Servpro in to dry everything (did I mention that our A/C broke the same day as the leak? Yeah, that was awesome), dealt with our homeowner's insurance, and now we've started renovations. We're doing it all ourselves, so it's going to be a long-ish process. The good news, is that I don't have to deal with a contractor, and I know everything will be done right and exactly how we want it.

So that's where we stand. It's been a real treat...

Wednesday, September 11, 2013

Hope y'all like house-related posts

I have so many things to update about, but no time to sit down and write.
 
I did some awesome crafty things over the summer, and definitely need to post about them, buuuuttttt... We also had a big leak in our house and have been unwillingly thrown head first into home renovations!
 
Lucky us!
 
Thanks to a plumbing issue, and the subsequent homeowners claim, we are now renovating our dining room, our laundry room, my craft studio, and one of the upstairs bathrooms.
 
Yup! Good times.
 
I really, really, REALLY want to start blogging more so I suppose this is as good of a reason as any, right?
 

Saturday, July 6, 2013

Quick Project: Burlap Valance

So, we finally worked on our staircase. You know, the staircase that I pulled the carpeting off of back in September? Yeah, that staircase. And it is turning out AMAZING! I have to do some touch up work, and paint our railings, but then it'll be all ready for its own little blog post.
 
While painting I realized that I have a whole other house to take care of (oops). We also have friends coming to visit next weekend, so I've been doing some small projects in addition to the staircase. Today I was cleaning and realized that our kitchen window really needed a valance.
 
I'm in yoga pants, a tank top, and covered in a fine layer of cleaning supplies and dust so running to the store wasn't an option. Solution? Leftover burlap + my sewing machine + 15 minutes = ...
 
I think that turned out well! Okay, break time is over... back to getting our house all ready for guests.
 

Saturday, June 15, 2013

Updates

I just noticed that it's been well over a month since my last post. To be quite honest, I feel like I've lacked motivation recently. I have my fleeting moments here and there, but once we got the yard done and finally had some free weekends to relax, I did just that... relaxed. I have lists of unfinished projects, a studio that is mid-reorganization, and a little more dust in our house than I generally prefer.
 
The one thing I have managed to do is get an Etsy store set up. I have a whopping 2 patterns available for digital download right now. That being said, I have about 30 that need to be converted from my pencil scribbles on graph paper. It honestly doesn't take long, but it gets a bit tedious. My shop is called Questionable Threads, and (for now) it is going to feature many of my cross stitch patterns. Eventually I'd like to also have full cross stitch kits, and the ability to take custom orders for finished pieces (for those who prefer to not stitch something themselves, but still want something awesome).
 
I have a whole bunch of DIY projects swimming around in my head, and some I even have all of the supplies for, but I really need to get my studio organized first. While on our usual weekend trip to Lowe's (yes, we'll go just to walk around and look at stuff), I found a 6-piece set of fabric closet organizers for $15. It had an over-door shoe holder, those hanging shelf thingies, and an under-bed box. AND it came in pink. I have a nicer set like this for our closet, but these cheapie ones seemed perfect for my studio, so they came home with us. J also got a set (in black) which now holds rifle magazines, gun cases, and other accessories in his man-closet.
 
I've had my studio set up for at least a year now, but I've been sewing and doing most other projects in our dining room. Why? I couldn't find the proper height (or priced) stool for the craft table we built, rendering it virtually unusable. Target came to the rescue on that one recently, and we finally found the perfect wooden stool for all of $20. So now that I can use my table, I can start crafting upstairs, and out of Jeremy's direct line of sight from the couch... which will finally stop the comments like, "Can't you use your sewing machine when I'm not watching tv?" and "When are you going to put this crap away?"
 
So, as you can see, it's been a rather uneventful month. No cool projects to report. I did manage to get into a car accident, so that's always exciting. I was stopped at a red light in a left turn lane (waiting for an ambulance to pass through the intersection) and the woman behind me thought it would be cool to just not use her brakes and plow into my car, while doing about 40mph, in order to stop. Don't text and drive, people! She had her baby in the car too, which pretty much sets her up for the Best Parent Ever Award.
 
The end result was a trip to the hospital for me, a few days of surprisingly bad pain from whiplash, and a car that is still in the body shop a month later. She hit me so hard that the back of my car crushed in far enough to squish the groceries I had just purchased at HEB. Did I mention that I drive a MINI and she was in an SUV? Yeah...
 
 
It doesn't look nearly as bad in pictures as it actually did in real life. Silly me got out of the car expecting to find a bumper that needed replacing and not much else. The whole back of my car is pretty much being rebuilt now. I really hope that the text she was reading/sending was worth slamming into me and risking everyone's lives. I'm just thankful that everyone at the intersection was stopped and saw what happened because she pushed me right out into the middle of it.
 
Okay, so now THAT is it for recent excitement. I'm heading upstairs to finish up my studio today, and it's now too hot for outdoor projects, so hopefully I'll have some blog-worthy things going on in the very near future!
 

Saturday, April 27, 2013

Front yard? Check!

It's done! It's finally done...
 
 
After much debate, we have finally turned our front yard into an aesthetically pleasing masterpiece. Okay, so maybe it's not a masterpiece, but it doesn't look like an out-of-control mess anymore. We found out that the previous owner was a landscape designer, which explains why we have tons of flower beds and plants all over our property. We've spent the past few months in our front and back yards taking down trees, ripping out bushes, and getting rid of anything that annoyed us and/or was too high maintenance. Last weekend we added mulch to our front flower beds, which marked the end of our front yard work for this season (yay!). Sure, we still have some stuff to finish in the back yard, but we're soooo close to being done!
 
The front yard was a huge project. Things grow out of control down here if you don't constantly trim and maintain. Our front beds had all sorts of low-lying shrubbery that went wild since we purchased the house.
 
 
As you can see in this picture (above) from when we first moved in (2011), there was a lot of greenery just waiting to let loose and take over the beds. We're from NJ. We had no idea that things grew like crazy all year round.
 
 
Last year (above), we tried our best to rid our beds of what we thought we couldn't control. As it turned out, the remaining plants decided to go buckwild and then they grew out of control. It was a vicious cycle.
 
That brings us to this year...
 
 
BAM.
 
Let's take a minute and look at some more pics of our hard work:


I'm so proud of us. J and I aren't the type of couple to constantly fight with each other while working on a project, so we are efficient and get things accomplished fairly quickly. This project? It wasn't quick. We've dedicated the past couple of months to serious yard work. We'll be doing even more today in order to get our back yard finished. From a new patio and custom built garden boxes, to cutting down trees and ripping out shrubs, we've done it all this spring. My next landscaping post will be dedicated to our back yard, but for now, I'm just damn proud of what we've done so far.
 
And, just for a quick side-by-side comparison:


Saturday, April 13, 2013

We're Crazy

Before you say, "Nahhh, you guys are fine!" let's take a look at this, shall we?
 
 
What is this, you ask? This is what I posted on Facebook and Twitter on April 11, 2011. Thanks to an iPhone app called Timehop, I can see my past social media history each day. The bigger question may be though, "Why does this post mean that y'all are crazy?" I'll explain...
 
I was at work that day, and J sent me a link. We had been looking at houses in NJ, and were having no luck at all. Everything we liked was way out of our price range, and everything else needed too many renovations. So, that day, J sent me a link to a house for sale in Texas and told me to just "look at it to humor him." Well, I looked at it for about a minute, picked my jaw up from the floor, and texted him back with something along the lines of, "When can we move?"
 
And that was it. April 11, 2011 was the day we decided to move to Texas. 3 months later we flew to Houston and bought a house. 1.5 months after that, we closed on the house and moved in. So, in just under 5 months we randomly decided to move across the country. We left our jobs, left everything and everyone we ever knew, and moved to a place that we had never even been to before. Yes, that's right, the first time we ever went to Houston was when we went to buy our house.
 
So, we're kinda crazy right? Okay, maybe "risky" is a better word. Regardless, I'm damn proud of us. So many people talk about moving here and there, but just stay where they are forever. We got an idea into our heads, seized the opportunity, and ran with it. Sure, we could've crashed and burned in a most epic manner, but we didn't. Maybe we got lucky, or maybe it was just fate. Regardless, it took us 5 months to completely change almost everything about our lives... and it was the best thing to ever happen to us.
 
If you take anything from this little lesson, its this: "Trust your gut and follow your dreams." Our entire relationship has been based on gut instinct. Everything from J deciding to date me (I'm still not sure what I did to make him stick around), to our cross-country move, its all just been a gut feeling as the driving force. If you're happy, you're not hurting anybody, and things feel right, you just go on ahead and follow your dreams. I know, it sounds like something you'd tell a child, but it holds true for all ages. You are never too old to change your life and follow a dream.
 
As a side note, here is what was going on one year ago today, on April 13, 2012:
 
 
It should be noted that we eloped 3 months later, and only told people via a photo on Facebook. Okay, so maybe "crazy" is an accurate word for us...
 

Sunday, March 24, 2013

Simple Decor Solutions: Bedroom

We've been doing a lot of work on our home and yard since returning from NJ. I don't know if its necessarily to keep our minds off of my father's passing, but it helps. Most are projects that we already had planned, but some were fairly spur of the moment.
 
We've done a ton of work to our backyard, which will be featured in its own post. Short story: new patio, raised garden boxes, and freshly planted beds. Long story: same as the short version, but with full details and photos. That's coming soon!
 
For now, to help me get back into the swing of blogging again, I figured a simple post with our bedroom updates will do. These were nothing major. I sewed our new curtains, and we hung wedding pictures. Sounds simple enough, right? The difference it made was fantastic!
 
 
The top picture is our room right after we moved in. The curtains don't match because they were left by the previous owner. As you can see, we also changed our bedding and moved furniture around. Really, the room only looked like the top photo for a little while. It had been in an in between phase for several months.
 
Anyway, here are the wedding photos that we hung:
 
 
And here are our curtains:
 
 
I had actually purchased curtains that were too short, but I loved the design. Solution? Buy complimentary fabric from Hobby Lobby and add to the bottom. You can better see the two designs in this photo:
 
 
And there you have it! A nice cozy bedroom. We're still on the lookout for a chair to place in front of the window, and the wall across from our bed is seriously lacking in style, but it's half-done at least. Small victories...
 

Friday, March 1, 2013

My absence

I'll have a much longer post about this at some point, but I just wanted to apologize for my lack of updates.

The day after my last post I found out that my father had a massive stroke. We immediately flew to NJ to be with him and my family. He passed away a few days later, and we remained up in NJ until after the services. We were there for nearly 2 weeks and, as you can imagine, I wasn't really in the mood for blogging.

I was very close to my dad, and it has been an incredibly difficult time. At some point I will dedicate a lengthy post to my feelings and memories, but I'm just not ready to write that right now. I'll be resuming posting as usual, but not because I'm callous or uncaring. I just need to get on with things, day by day. I will need to get a post out about all of this at some point, but not yet. Definitely not yet...

I will say this though: Always say "I love you." Cherish every day. And never go to bed angry. I try to live my life like this, and I am so thankful that I do. I miss my dad terribly, but I have no regrets. The last thing I said to him just the day before his stroke was, "I love you."

Sunday, February 10, 2013

Cookie Cups

Yeah, that's right. Cookie cups. Stuffed with peanut butter and Nutella. These little bites of gooey bliss are sweet, adorable, and super simple. So simple in fact, that I don't even need to provide you with a recipe.
 
*gasps*
 
I know!!! This might be the simplest recipe I've ever blogged.
 
So here's what you do... Get some cookie dough. Any kind will do. Homemade, pre made, sugar cookie, chocolate chip. Seriously, whatever your little cookie-loving heart desires. Today I used my homemade chocolate chip cookie dough.
 
Preheat your oven to whatever temperature your cookie dough calls for. In the meantime, spray a cupcake pan with cooking spray. Take your cookie dough and roll it into balls, approximately 1 inch in diameter. Place one cookie ball into each cupcake well. Pop into your oven and bake until edges are golden.
 
You'll notice that as your cookies bake they perfectly fill up the cupcake well. No need to spread the dough along the sides, or push it into a cup-shape prior to baking... None of that. Trust me. Just drop the dough balls in there.
 
Once baked, allow to cool for a couple of minutes in the pan while you go find a shot glass. Take a shot if desired. Take the bottom of your shot glass and press into the center of each cookie. Twist the glass slightly so the cookie doesn't stick. Allow to cool for a couple more minutes... and do more shots if you feel so inclined.
 
Pop your cookie cups out of the pan and transfer to a cooling rack. Put some Nutella and peanut butter into separate bowls. Warm each quickly in the microwave for about 30 seconds, just to give them a more fluid consistency. Pour your fillings into the cookie cups, and you're left with this:
 
 
The centers will firm up after about 3 hours, but you're going to want to eat a couple in all their gooey glory.
 
 
Like I said... You're really going to want to eat them warm. Enjoy!
 

Saturday, February 9, 2013

DIY Frozen Glass

We don't get snow here in Houston. That's pretty obvious, no? Our home state of New Jersey, however, just got dumped on by Mother Nature. So today seemed like the perfect time to post this project, considering the fact that faux snow is the closest I'm going to get to the white stuff for a long time.
 
You can do this project with any non-food glassware. I'm assuming that a majority of the ingredients are somewhat toxic, so please don't do this to champagne flutes or something. Let's be smart. I used a flip-top glass jar from Ikea that had been sitting around in our cabinets.
 
I should also note, that if you read my previous post, this project didn't turn out exactly as planned. I had intended for my jar to be opaque, but wound up with a much different result. With the coating on the outside of the glass it didn't make a huge difference, but it should be noted that this project will look slightly different if using a true opaque acrylic paint on the inside. With that being said, here's your how-to...
 
 
For the first part of this project you'll need your glass item, Mod Podge, diamond dust,* a paintbrush, and a mixing cup.
 
*I used a product called diamond dust. I've seen it at almost every craft store, and I think it's pretty crucial to the outcome of this project. It is not your standard glitter. It looks like little clear shards of plastic. You can use it to coat ornaments, fake fruit, etc.. It should be in the glitter aisle, so look carefully! You need the rough consistency of the diamond dust to achieve the icy effect.
 
 
Mix your diamond dust and Mod Podge.
 
 
It should have a lumpy consistency. If it is too watery you won't get the nice "ice clumps" on the outside of the glass. This isn't an exact science, but thicker is better (not too thick though!)
 
 
Don't freak out! Your glass WILL look like this, but I assure you that it will dry clear. I put on one thin coat, let it dry for a few minutes, then liberally applied a very thick coat on top. You'll want to let this dry at least overnight so you can easily handle it for the next part of the project.
 
 
See! It's clear! I told you so...
 
 
Once dry, you'll want to get out the most disappointing paint in the world, or any other acrylic paint of your choosing. You can use a white paint and tint it ice-blue, or buy one that is pre-colored. I chose a paint that had glitter in it, but that is definitely not a requirement since the outside of the jar is glittery on its own.
 
 
This is the color I mixed into mine. It was just a combination of a dark blue and a dark green. I used just a few drops of each because I didn't want it too dark.
 
 
Next, you'll pour your blue paint inside of your glass. You're going to need more than you expect, so be prepared. Turn your glass to cover the entire inside with a layer of paint. It takes a little while, so be patient.
 
 
Place your glass upside down on newspaper for 30-45 minutes. This is crucial. After sitting for the allotted time, prepare yourself for a paint wave. Pick up your glass quickly, and you'll see all of the excess paint quickly flood out onto the paper. Throw it away and put your glass, right side up, onto fresh paper.
 
You want to get rid of as much excess paint as possible to help with drying time, and to not have a dark pool of paint on the bottom of your glass. Wait out the full 30-45 minutes. Trust me. It's worth it.
 
Finally, allow your piece to dry, attach a ribbon or other decor that you have lying around your craft room purchased for this wintry project, and ta-da!
 
 
Your own frosty little piece of glass with absolutely no real freezing required!
 
Here is a close up of the exterior ice"
 

Monday, February 4, 2013

Dear Martha

Dear Martha Stewart,
 
I've always felt a smidgen of self-loathing anytime I liked one of your company's ideas or products. You seem like a very rude and phony woman, with whom I would never actually enjoying doing crafts. However, over the weekend I was lured into purchasing one of your products that are now carried at Home Depot.
 
Namely, this...
 
 
"Oh sure," you say. "My special glitter finish. You use that as a top coat."
 
"You lying bitch!" I exclaim. "That is most certainly not how it is advertised in your store display."
 
I went into Home Depot looking for a simple white, acrylic base to coat the inside of some decorative glassware. It was an idea I had seen on Pinterest, of course. Normally, I'd make this sort of purchase at Hobby Lobby, but it was Sunday and we were already at Home Depot.
 
I wandered over to the paint section and was greeted by your large end cap display of decorative paints. I picked up one of the small plastic pots and immediately noted the watery consistency. It seemed perfect for my project, since I would be needing to water down any standard acrylic paint. As I examined the white, glittery concoction I noticed that it specifically said "decorative finish."
 
I reluctantly placed it back onto the rack, as I desired something more opaque. However, upon further inspection I noticed there were sample boards attached to the display, which showed the finished product of all of your nifty little paints. And there it was in its white, sparkly, totally opaque glory... Icecap White 442 843.
 
I was so excited about this paint, with its perfect consistency and opaqueness, that I totally disregarded my lack of trust in your charlatan "DIY" company. I quickly snatched the pot back up and hurried to find my husband. While checking out I grimaced at the nearly $9.00 price tag for a mere 10 oz of paint, but it was going to be perfect. It's the type of paint that I imagine would result from grinding-up and liquefying unicorn horn. So home it came.
 
Tonight was the moment of truth. I used your magical glitter paint to coat the inside of a vase to create a faux milk glass effect. I then tinted some more of the paint and coated the inside of an old mason jar. I was ecstatic. So happy in fact, that I Instagrammed my beloved project...
 
 
Do you see it? Do you see how perfect that looks? I left my precious glassware out to dry while I went about my evening. I returned to our kitchen to, once again, admire my work and quickly noticed a problem. It appeared as though the paint hadn't properly dried to the top of my vase and slid down the sides before it was fully dry. I picked the vase up to invert it for further drying, hoping the paint would run back in the other direction when, to my horror, I noticed that it wasn't at all what I thought.
 
 
The paint was drying clear... Like a glaze. I looked in horror at both of my projects just to confirm. My fears were correct. This beautiful, opaque paint that looked to cover perfectly in the store's sample, was basically glorified nail polish. I should've been more wary when I opened the paint container and noticed that it smelled like a vodka-soaked frat house the morning after a huge party. I knew acrylic paint didn't have that smell, but I was bewitched by the sparkle.
 
So here I sit, watching the paint dry onto nothing like what my creative mind envisioned. I don't really know how to fix this, Martha. I'm assuming that I'll just get some real acrylic paint and put a second coat onto my glassware, but that's not the point. The point is that your paint display is nothing more than a hoax. A sham to swindle well-meaning DIY'ers out of $9.00 for a sparkle-filled lie. I know, you'll say that the paint pot clearly says "finish" on it. I was well aware of that. However, your deceitful sample was my undoing.
So I hope you're happy with my $9.00, but it's not about the money to me. It's about the fact that your company charges double what your products are actually worth, for some half-assed craft shit with your name slapped on the front.
 
So Martha, while I'm sure I will find a use for the remainder of my specialty finish, I will be using it begrudgingly and cursing your name with each brushstroke. If you are going to sell craft products at least, for all things good and holy, show an accurate depiction of what your product does (and doesn't) actually do.
 
Thank you,
 
Heather G.
An actual artist and crafter
 

Friday, February 1, 2013

February

I can't believe it's here already. I used to dread February when we lived in NJ. Sure, it's a short month, but it's sandwiched between January and March. You're full swing into that post-holiday I-guess-its-really-winter decline, but spring is still a couple of months away. Valentines Day is in there, but who really cares about that? February is a rough one for most folks in colder climates. And don't get me started on March...
 
Down here it's the complete opposite. Our "winter" is over by now. I define a Houston winter as a period of time when high temperatures are well below 50. We had it for about two or three weeks this year, accompanied by cold rain. We've been back up into the 70's since the end of January. It'll still get cold at night, but I'm calling it... It's springtime.
 
And since its warm here again, February brings with it all the usual springtime stuff: flowers, open windows, BBQ'ing, and of course, landscaping and getting a garden started. Ahhh, gardening. A relaxing hobby that gives back to you in the form of a rich bounty of herbs, flowers, fruits, and veggies. Or, in my case, that dusty patch of earth in our yard and half empty pots with dried, dead plants that thrived prior to being placed in my care.
 
I have a love hate relationship with gardening. I can grow a seedling like nobody's business. That shit thrives, y'all. It's the part afterwards that results in death, frustration, and a yard barren of all fancy vegetation. I'm convinced the only reason our grass looks so nice is because its where the dogs shit. Free fertilizer!
 
Anyway, I'm going to try my hand at some landscaping again this year. Hopefully I can turn my thumb green and actually get some stuff to grow. I don't really have any garden plans, but I'm sure I'll put some herbs and peppers into some patio pots. Our main focus is on our front yard.
 
 
Yeah sure, it looks nice in that picture. What we didn't know is that stuff grows out of control down here in the perpetual sunshine. We're planning to rip out a lot of the ground vegetation in the beds and replace it with more manageable plants. Namely, hostas and palms. It's going to be a big job, but it needs to be done.
 

Tuesday, January 29, 2013

Big projects coming up

Hooray! We're getting a tax return this year! Of course, we can't just save it like normal people. No, we're going to sink some of it into home renovations. Three projects will, hopefully, be tackled and make a huge difference in our house.
 
First project: The stairs
I'm not even going to post a current picture of our staircase. Lets just say I saw one too many painted staircases on Pinterest and went balls-out tearing up carpeting while Jeremy was away one weekend... a while ago... okay, it was in September. So yes, we've had a horrible naked staircase for a few months. This is how they looked before I got my hands on them:
 
 
Why didn't I just finish the project? Well, I made a discovery underneath our carpet. Our treads are nice solid wood, but the risers are the shittiest particle board you could imagine. So that stalled me in my tracks and left us looking for options with regards to what to do with our risers. We've settled on just cutting wood and fitting it over the particle board, so we have a game plan. The risers will be white, and the treads and railings will be a dark espresso brown. This won't be an expensive project, but it's labor intensive. It also really needs to get done, so it's at the top of our list.
 
Second project: The patio
I'm not 100% sold on this project, but J really wants it so we're doing it. Our patio now consists of a walkway to the garage, a tiny slab off of the back door, and some large paving stones behind the chimney. It's a hodpodge of surfaces that are awkward in shape, and don't afford very much room for seating and grilling. Our grill is currently located on the section of miscellaneous paving stones, our picnic table is actually on the lawn, and we have a chair and side table on the actual patio. So okay, maybe we do need this project.
 
What we'll be doing is having a new slab poured next to what we currently have. It'll add on a good chunk of space and extend the patio out into the yard, instead of just hugging the house. I don't have a good current picture of the yard, so we'll use these for now. Also, 3 out of 4 trees are now gone... Guess which?
 
 
The grass area in the first pic (nearly up to that first tree on the left) will all be patio. It'll extend over and replace that part with separate stones, and it'll be next to that walkway in the second pic. We're going to angle the new corner as well (instead of laying down just a square), to avoid interfering with drainage and to give the whole patio a nice shape. I know, its hard to visualize. Once it's installed I want to get it stained. I hate how regular concrete looks... all boring and gray. So making the patio bigger isn't going to sit well with me aesthetically if its just a big, ugly, gray mass sitting in our yard.
 
Third project: The kitchen
I love our kitchen. It's big, it's open, everything works, and the cabinets and floors don't need to be changed. The things I dislike about our kitchen are the bathroom-esque tile backsplash, the horrible countertops, the cabinet hardware, and I'd kill for non-white appliances. Here she is from when we first moved in, in all of her bright white glory:
 
 
Sure, it's big and clean looking, but it's totally 90's style. The first part of our plan is new countertops. However, with the new countertops comes the need for a new cooktop and sink. We want to get the counters done in dark stained concrete, so a white sink is kind of not hot with that style. The cooktop, in addition to being white, is also coil burners and the bane of my existence in the kitchen. I hate coil burners with the white hot passion of a thousand burning suns. Eventually we'll have our gas line run to the kitchen so I can have a gas cooktop again, but that's a project for a full kitchen renovation... not just some simple updating. So the cooktop will be replaced with a sleek black glass-top.
 
Since we'll be getting the counters done, we'll obviously need a better backsplash. Preferably one that doesn't look like it belongs in a public bathroom. For this, we'll be taking out the tile and replacing it with Airstone in this color:
 
Check out the website for the lowdown on Airstone. I have a feeling we'll be covering the tile around our fireplace with it as well. It's lightweight, simple to install, able to be cut with a hacksaw, and only $50 for 8 square feet. The tile I originally wanted was $10-12 per square foot, so this is considerably cheaper and I love the look.
 
The final part of our kitchen renovation will be new hardware. I want the cup-style handles on all of the drawers, and all stainless will be changed to oil-rubbed bronze. We're slowly converting our house to the bronze, so anytime we replace metal hardware we upgrade. Sometimes an upgrade is buying new stuff, sometimes it's spray painting with Rustoleum's "Oil Rubbed Bronze" paint. Either way, it looks great. I hate the brass stuff that was left in the house, and I've never been a big fan of stainless steel.
 
So that's the plan. All written out like that, it looks like a ton of work. And I guess it kind of is, but it's going to be SO worth it. These are big updates we've been thinking about for a while, so to finally take the steps to get it done is huge. I'm incredibly thankful that we got a tax return this year that allows us to do these things, and still have some to set aside for savings. Definitely thankful for that.
 

Sunday, January 27, 2013

Piggy cupcakes

These are some of my favorite cupcakes to bake. They're really quite simple to do, but the reactions when people see them are what's best!
 
Plus I can be sloppy with the frosting and just plop it on top, because once rolled in sugar I can hand form it into a neat and tidy little dome. Anything that doesn't require me to break out my cake decorating stuff is great.

Saturday, January 26, 2013

Fast and cheap bathroom update

We have 3.5 bathrooms in our house. Are they livable and functional? Absolutely. Are they my style? Not really.
 
Our house was built in 1994, and while it was used as the model home for our development, that didn't motivate the builder* to use anything other than cheap, builders grade materials. The previous owner also had the house white-washed (well, warm-beige-washed to be exact), so everything is very neutral. Turns out, she had them paint over hideous wallpaper in two of the bathrooms, but that's an entirely different project.
 
Anyway, we had made some minor changes to one of the upstairs bathrooms already, but all of the others have been left untouched. This past weekend I decided to tackle the half bath on the first floor. This is just a guest bathroom, and if the door isn't closed (it usually is), then this is generally what you see:
 
 
It's not terrible, but it's dated. Next to the sink is a window, and across from the sink is the toilet and a large, white cabinet that looms above it. Why? I don't know, but it's big and it's there. I hated the cabinet so much that I don't even have a "before" picture of it.
 
Since this is just a guest bath, I wasn't about to put money into drastic renovations. We need that money for a new patio and kitchen counter! With this room, if I do one big thing, I have to do it all... If I take out the vanity I have to replace the tile floor, tear out the wallpaper, and rip the cabinet down. Any combo of these tasks results in the others needing to get done as well. Solution? Paint and Pinterest.
 
I read about painting cabinets on Pinterest and was intrigued. Testing it out on the least amount of cabinets was also right up my alley. So, off came the doors and everything got painted with Valspar's "Fired Earth" in a semi-gloss finish.
 
 
I decided to salvage the dated brass hardware, and gave everything a coating of Rustoleum's Oil Rubbed Bronze spray. The hardware style is still kind of dated, but at least it's not brass.
 
 
We haven't replaced the faucet yet, but it's an inevitability at this point in time. It sticks out like a sore thumb now, and J knew I'd be begging him to change it as soon as I got everything else done. This is what I'm thinking for the faucet:
 
 
Aside from that detail though, it's done! If I had time and money I'd gut the whole bathroom and update everything, but for now this will do just fine.
 
 
And for good measure... A side by side comparison:
 
 
*Fun fact: The home builder for our development is actually in jail because he used the crappiest, most half-assed materials he could find on ebay. Apparently there was a thing with him vs the homeowners, court, lawsuits, etc. Luckily, while our home has flaws, it was spared the worst defects. For example: We have full exterior brickwork over wood, as opposed to wood filler with siding glued on top. Yes, it really happened to our neighbors.